Showing posts with label makeup. Show all posts
Monday, 2 May 2016
Final Photoshoot: Clown makeup application
As the model for the clown, I was able to transfer the skills and technique I used when I practiced this look on my own model to my face today. Beginning with the base of white, I then followed the natural lines of my face to contour in over exaggerated blue lines. These where then shaded out and defined using light and dark tones. The red lips and 'bulls eye' nose could then be applied, this time using red face paint instead of red lip stick, as the materials were available to me this time round. The costume could then be put on and the overall character could be seen.
Overall this make up was a lot quicker to apply than the mermaid for a few reasons. Firstly I didn't have to glue my eyebrows down for this look, which saved a lot of time. Secondly, I'm a lot quicker applying make to my own face as opposed to a models because the caution of being too harsh isn't there. Thirdly, overall this was a simpler design. Because of this I prioritised getting the mermaid's makeup completed before beginning my own, as I knew I could finish this look in under 10 minutes. In terms of time management of the shoot on the day, I prioritised the more complex and time consuming character first.
I'm very happy with the final look of the clown, and thought it was odd how much it actually changed the shapes of my face! Because of this transformation I think that this design was successful.
Final photoshoot: Mermaid makeup with a model
These photos were taken by me on the day of the final photo shoot. After practicing the makeup on myself previously and making notes of the step-by-step processes I found it a lot easier to transfer the make up to model. Without a practice run I definitely would have found this a lot harder!
This was one of the first times I've applied makeup to someone else so that altogether was quite an odd experience; I find with my own face I'll be quite ruthless with makeup, and found I was overly cautious using a model I'd never done makeup on before! Overall I had a lot of fun doing this though and would definitely like to do more makeup using models in the future. I'm also really pleased how the final makeup design has turned out, and think that the model was well chosen in order to convey the sassy, punky mermaid the narrative and I designed.
Tuesday, 26 April 2016
Makeup Kit: April 2016
Not including my day to day makeup kit! I'd like to start doing updates of my makeup kits as seeing how it evolves with the experience I gain would be interesting to look back on. This is also the kit used for making every makeup look so far.
1. Wig cap. Used for holding hair back when putting on makeup or tucking hair away when putting n a wig.
2. Eye kit. Includes mascaras, and different kinds of colour and consistencies of eyeliner.
3. Face paint. Snazaroo is the current favourite!
4. Lip kit. Includes lipsticks, pencils and tints.
5. Eyeshadows. Can also be used for contouring, especially when face paint is being worn.
6. Silver beads. Used as fake piercings that can be applied with eyelash glue.
7. Glue stick. Used to stick down eyebrows when covering them up.
8. Foundations of different colours. Variety of colours can also assist in contouring.
9. Brush collection. Foundation, eyeshadow, smudger, and blush brushes.
10. Sponge collection, including a stipple sponge, application sponges and a blending sponge.
Monday, 25 April 2016
Expressions and Characterisations.
While still wearing the makeup, we thought to take the opportunity of playing around with what the makeup can do through expressive face pulling! Also thinking of the characterisation of the narrative, I tried to play the mermaid as grungy and roguish, as thats how the model will be acting in the final photoshoot. The clown too was playing with a range of facial expression. It was fun to see the characters together, and gave me in insight to the personalities too.
Clown Makeup Practise
Using the Cirque Du Soleil mood board as reference whilst figuring out the makeup on my models face, I firstly painted on a white base coat of snazaroo body paint. Making him flex his face and pull a lot of different expressions, I was able to outline faintly the natural creases of his face in light blue pencil. These would act a guide later on when shading in the spaces so only needed to be indistinct as it would be worked over once I began shading. Using blue and purple eyeshadow I shaded in the lines, with a black eyeshadow right at the base of the lines to give a more defined and dramatic contour.
The lips where drawn in with a red lip pencil, then filled in with lipstick. The nose bullseye design was also red lipstick, as I currently don't have red face paint in my personal makeup kit.
Once the makeup was completed we experimented with different expressions to see how the paint moved with the face, which gave results I was really happy with! As a clown, I think it's important to keep the ability to use facial expressions, which I feel was successful in this experiment.
Saturday, 23 April 2016
Mermaid Makeup Practise
Using my own makeup kit at home (photo to follow) I experimented with the drag/ punk mermaid character makeup after being inspired by the research images put together. My main goal was to avoid looking petite, pretty, nymphy or waif-like, and instead create the punk with attitude as discussed with the narrative.
Top 1 and 2: This was the first step of the makeup. First a base coat of white snazaroo body paint was applied to the lower half of the face whilst layers of glue were applied through the eyebrows. Glue should be applied first against the grain, then following it, smoothing it flat. Once dried, these layers of alternating glue and translucent powder were built up, then covered with a layer of mouse foundation. Following this, the white paint was then brought up to cover the entire face, a few coats of this were necessary to get an even coverage. Dark purple, black and red eyeshadows were used to sculpt out the basic contouring seen. These colours were decided through looking at the research mood board posted previously, as blue pinks and greens seemed popular colours in the 'seapunk' sub-culture.
Top 3: Greens, blues and purple shades of eyeshadow were used to contour the rest of the face, then a blue eyeliner to outline the shape of the oversized lips. Shading and blending were big aspects to making this a successful drag look! The same blending applied to the lips, to give an impression of them seeming bigger than they actually are. This was done through using a darker liner, and a lighter colour in the centre of the lips. I gradiated from dark blue and black through to a lilac centre shade.
Top 4: Experimenting with nostril shape. In my designs I've specified having small, slitted nostrils so I drew these in with black face paint and eyeshadow. In this image the nostrils are cutting up vertically. However, I didn't think this effectively followed the natural shape of the nose so in the next image (top 5) I had rubbed off this attempt and drew in nostrils that went out, then up. These looked more natural, and whilst I'm not attempting to create a 'natural' makeup look, I still want the 'mermaid biology' and structure to appear believable.
Bottom row: In the following images the makeup look was complete and the only thing left to do was experiment with hair. Having a big mohawk to resemble a fishes fin would be ideal, but I currently don't have the resources to do that, unfortunately. I sent these images to the rest of the group to critique and I got a very positive response to the makeup that I was really pleased with. There was a general agreement that the final silver and blue wig was a favourite amongst them, so I included two pictures of this one. The two toned hair and sharp block fringe contribute to the edgy punk vibe, in my opinion.
Currently, this look is obviously without prosthetics as I have yet to begin making them . I feel that if the prosthetics don't get finished in time then the look still comes together and works for the character without them, although I will still try to manage my time well enough to get these complete with the team work from the rest of the group.
Thursday, 21 April 2016
Orpheus: makeup design experimentation
To go with the Hades make up test I also experimented with potential designs for the character Orpheus.
Inspired by the traditional Greek history of the play, I designed this makeup to resemble a mask, symbolic of the kind of masks performers would wear on stage. The top row of images show a simple black and white palette, whereas the bottom row displays an under-eye tint of red to tie in with the burlesque and cabaret theme.
The gradient effect was inspired by the previously put together influence map. The darkest line cuts across the forehead, but the shaded aspects are quite subtle over the actual facial features, so I feel that this design wouldn't detract from the actors expressions.
Again, I'm not sure if this look is muted enough to combine well with the prison scene? It could match the burlesque club environment but less so the prison, which is the same situation as the Hades design right now.
Hades: Makeup design experimentation
Inspired by the mood board of costume and makeup designs I put together for Hades I decided to experiment with some makeup looks of my own. I really liked the dramatic shading and contouring, as well as the slightly gothic aesthetic that was evident in a few of the images.
One of the first things I noticed throughout the mood board was the sharp, thin and sculpted features created with makeup, and so used a gradient contour to form theatrical cheekbones and features. Evil characters are also often designed with long, sharp, pointed features assisting with their villainous characterisations.
I also had in mind that this would be performed on stage, so the makeup had to be a little heavier than normal so all audience eye lines would pick it up. I also chose a black and white palette to experiment with, as it makes the whole look more dramatic.
The characterisation of Hades that the performing arts students seem to be looking for is something I can see in Moulin Rouge's, Harold Zidler (as pictured in the previous post). A powerful, charismatic man who plays the rest of the cast like puppets. It is when the students requested a red tail coat and top hat for Hades that this resemblance came to mind, so making a younger and perhaps little more wicked looking version of this character could be what they're looking for.
I kept in mind that all characters will be performed in two different environments; the burlesque club named 'The Underworld', and the prison, so the makeup would have to suit both of these locations. Because of this I toned it down from the images on the mood board, but am still not sure if it will suit the prison scene. Maybe creating a more subtle look using natural tones rather than black and white could be the answer to this?
Currently I'm unsure whether the students require makeup or makeup designs from us yet, but I feel it's better to design them and have them ready to be critiqued than not, and took the opportunity to practice while I had an available model!
Tuesday, 31 March 2015
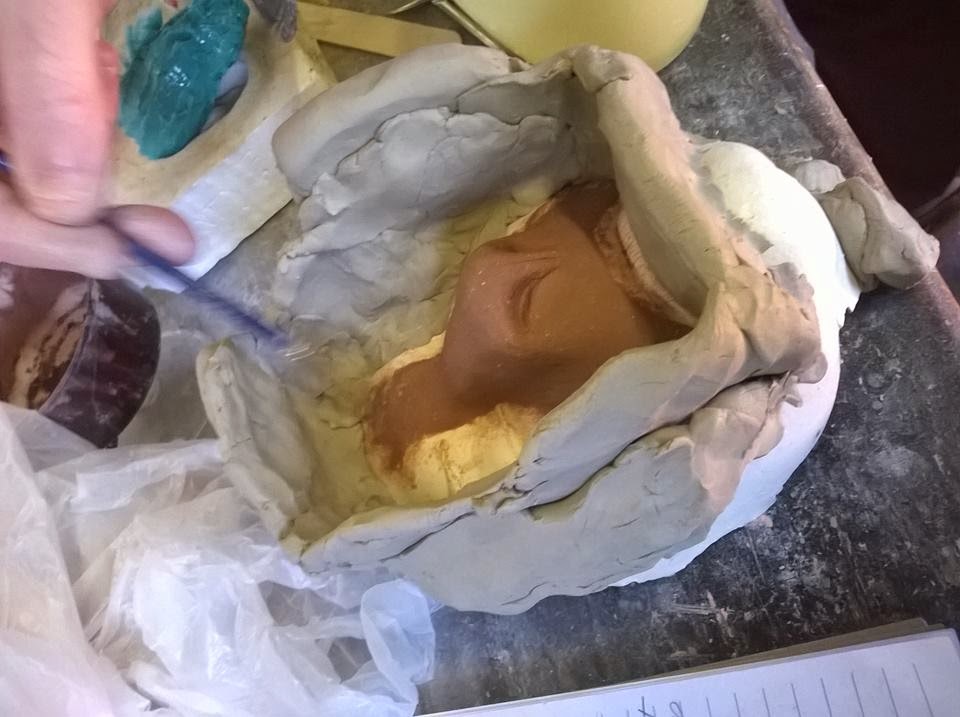
Prosthetics; Plaster Casting
![]() |
| This shows the plasteline and face cast base once the plaster has been poured over it. |
Sunday, 29 March 2015
Prosthetics; Texturing
Prosthetics; Character Nose Sculpting
![]() |
| Pictured is the final sculpt before I textured or took a cast of it in plaster. Pictures to follow! |
Thursday, 12 February 2015
Visual Narrative; Makeup Edits.
Visual Narrative; Character Interpretation Make Up.
For the visual interpretation part of this terms uni project, we are studying Bartok's opera, 'Bluebeard's Castle.' To look into the personalities behind both main and side characters, my group and I decided to turn our interpretations into real life characterisations through makeup. Each different makeup style was either based on an alteration of the original character, e.g. gender swap, or fashioned around one of the themes we're contemplating to base our future collaborative set piece on; in this case, the themes I concentrated on where 1920's Toy Shop and Fantasy Woodland.
Subscribe to:
Posts (Atom)