Tuesday, 13 December 2016
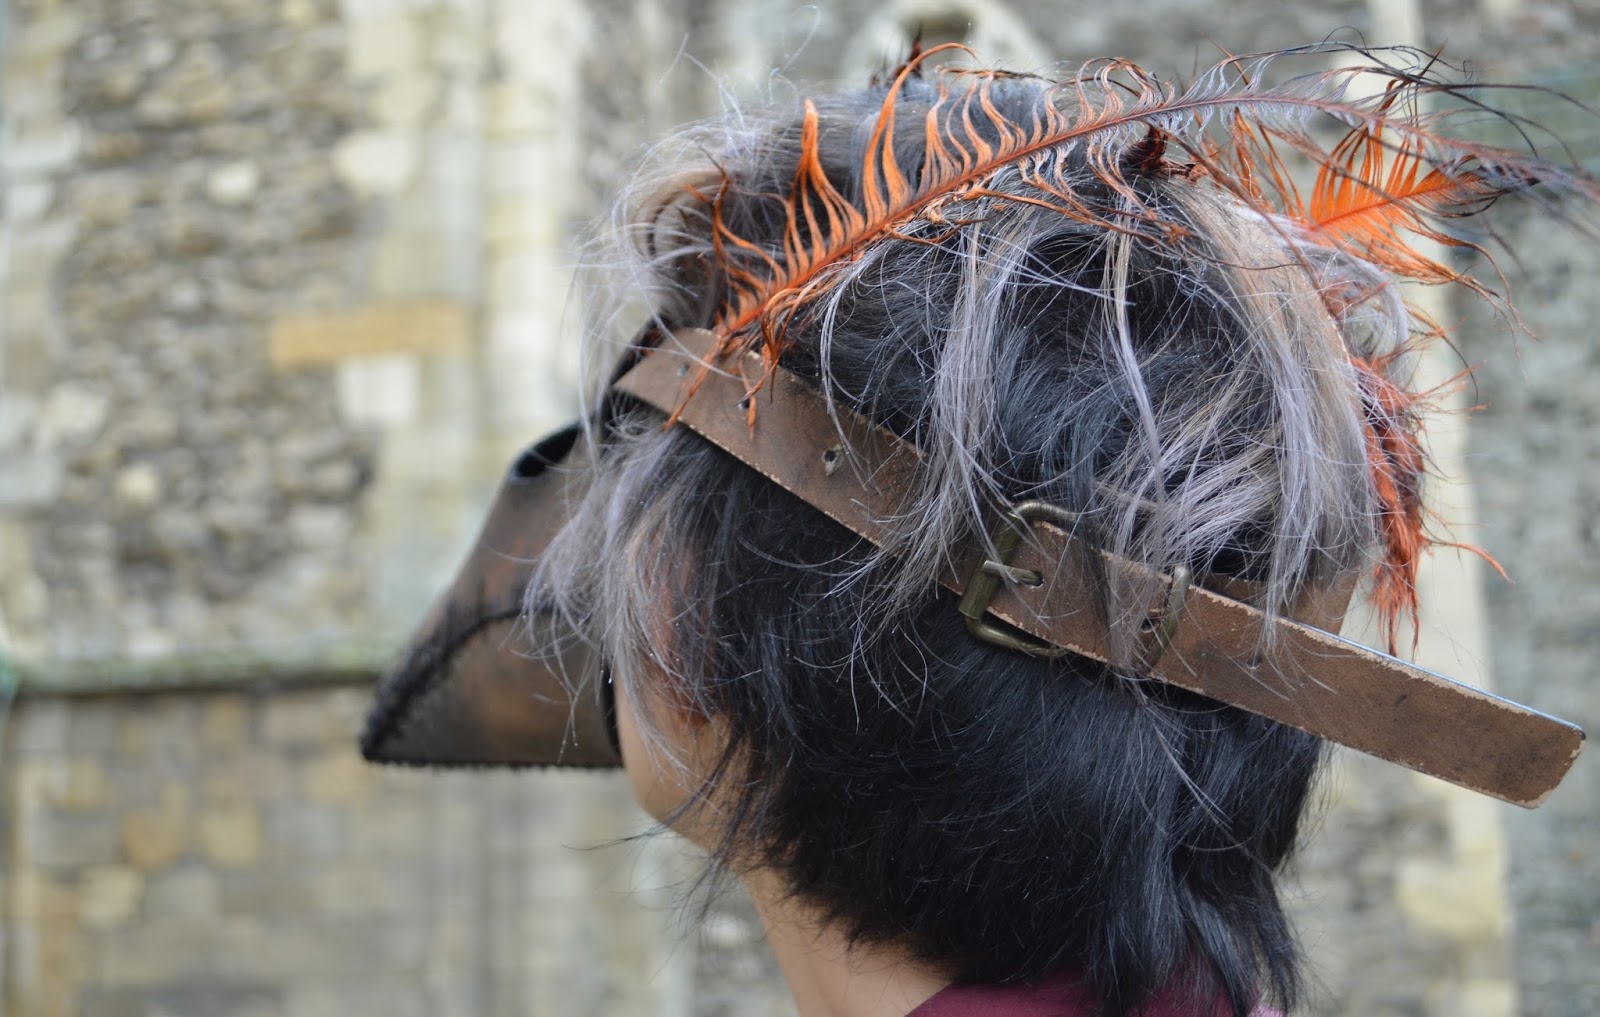
Final Mask Photoshoot: Close ups.
Photos taken during the final mask photoshoot: I wanted to get a few pictures that focused on the distressing and detailing of the mask, e.g. the 'dirt and drool' around the beak, the distressed belt at the back and the feather detailing.
Mask Progression: Final mask, dying and distressing.
1) The final mask pieces cut out. The piece to the left has been untouched, but the piece on the right has been sanded and textured using P120 wet and dry sandpaper.
2) The stained and textured jaw panel pinned to the to side pieces of the mask. I figured out with earlier prototypes that this is the best order in which to assemble the mask.
3) Jaw and side panels hand stitched together. Center seam pinned into place.
4) Samples for the leather belt strap that will go round the back of the head.
5) Gluing the leather head strap into place after measuring and texturing.
6) A selection of tea and coffee I plan on using to texture the end of the beak; I want it to look like theres food, rot and dirt where the mask has been used so much and become a part of the character.
7) Feather distressing samples: made using black acrylic paint and water.
Monday, 12 December 2016
Pigment Casting.
I experimented with a few different coloured pigments during the casting process of making these faces. The first column shows the three different characters with no pigment. The second shows Yool and Ty with pink pigments, (although Yools turned out too pale so I re-cast this one afterwards.) The owl is cast with a bronze powder rubbed into the mould before resin is poured in; bronze powder was within the resin as well to ensure the colour transferred all the way through the cast. The final column shows some random colour experimentation that I thought would suit the characters; Yool as a gentle pastel blue, Ty with stronger golds and khakis and the owl as a pale yellow. To achieve the pastel colours I had to be really precise with how much pigment I put in, as it was really easy to add too much and for the colours to come out too strong!
Labels:
3d,
casting,
sculpting,
the greeks,
university,
year3
Box Making.
I asked Billy to help me out in making a box with some shelves within it in order to display my maquette face casts. I wanted to put effort into displaying these professionally, as learning how to do this was one of the points of focus I had in the last run of this project. After drawing up a simple blueprint for measurements, cutting the pieces and beginning to assemble them, I realised that we forgot to take into consideration the extra 5mm that the sides of the box added. Because of this, I stuck together what I could and will have to re-cut some new side pieces asap. I plan on simply painting the box a matt colour once it's assembled, as I want it to look smart but not detract from the casts themselves.
Fast Cast casting with Silicone moulds.
![]() |
| This shows the surviving sculpt after been removed from the silicone mould. Resin has been poured into the mould which was cleaned out beforehand. |
![]() |
| Shows the desk area while casting the faces; Essential items where a set of scales, two part resin, pots and stirrers, silicone mould, newspaper to protect the table surface. |
Labels:
3d,
casting,
mould making,
sculpting,
the greeks,
university,
year3
Sculpture Casting.
![]() |
| Once the faces where sculpted out completely and smoothed down, I built small walls around them in MDF to form the walls for the mould. |
Labels:
3d,
mould making,
sculpting,
the greeks,
university,
year3
Friday, 9 December 2016
Character face sculpting progress.
As I'm looking into stop motion puppets and maquettes, I've decided that one part of my making aspect of this project will be focused on character designs, concept art and realising these figures in 3D. Although I know that hand sculpting and casting faces is no longer a widely used method in industry; as 3D printing is now much more efficient in terms of cost, time and accuracy of detailing. I'd still like to practise this method as it's good to understand the past methods used and how we've progressed. For a prototyping project I feel that this method is also appropriate.
I have a small amount of experience with sculpting and casting, so wanted to use this project to practice these skills. I would definitely like to look in 3D printing, but that would require using software I've never even learnt the basics to and in terms of my time management I'm not sure this would fit in with the schedule at this point in the project.

To begin sculpting I had to decide on what materials and style it is I wanted to use and create. I decided on chavant to use to sculpt the faces in, as its quite easy to use and smooth out if you know the right techniques! Chavant is oil based so doesn't air dry, meaning I can work on the sculpts, leave and come back later without them drying out or cracking. Another advantage to this oil based clay is that once you've cast it, you can reuse it (as it wont have dried) so its quite cost effective and lasts a while. A lot of detail can also be picked up with chavant, making it suitable for any size sculpts!
I decided on working with a flat surface, as I want the face to be interchangeable possibly with the use of magnets on the back of them. As someone who doesn't have an awful lot of sculpting experience, working on a flat surface was also easier for me at this point.
I now realise that working in 3D could gave been a lot more beneficial but I have learnt from this! Seeing the heads as 3D, being able to see every angle of them while I was sculpting would have helped a lot with proportions.
The style I decided on was quite flat and usually based on one base shape per character, e.g. circles for Yool, Triangles for Ty. The sticky out ears, wide eyes and shape based forms were all design choices.
Subscribe to:
Posts (Atom)